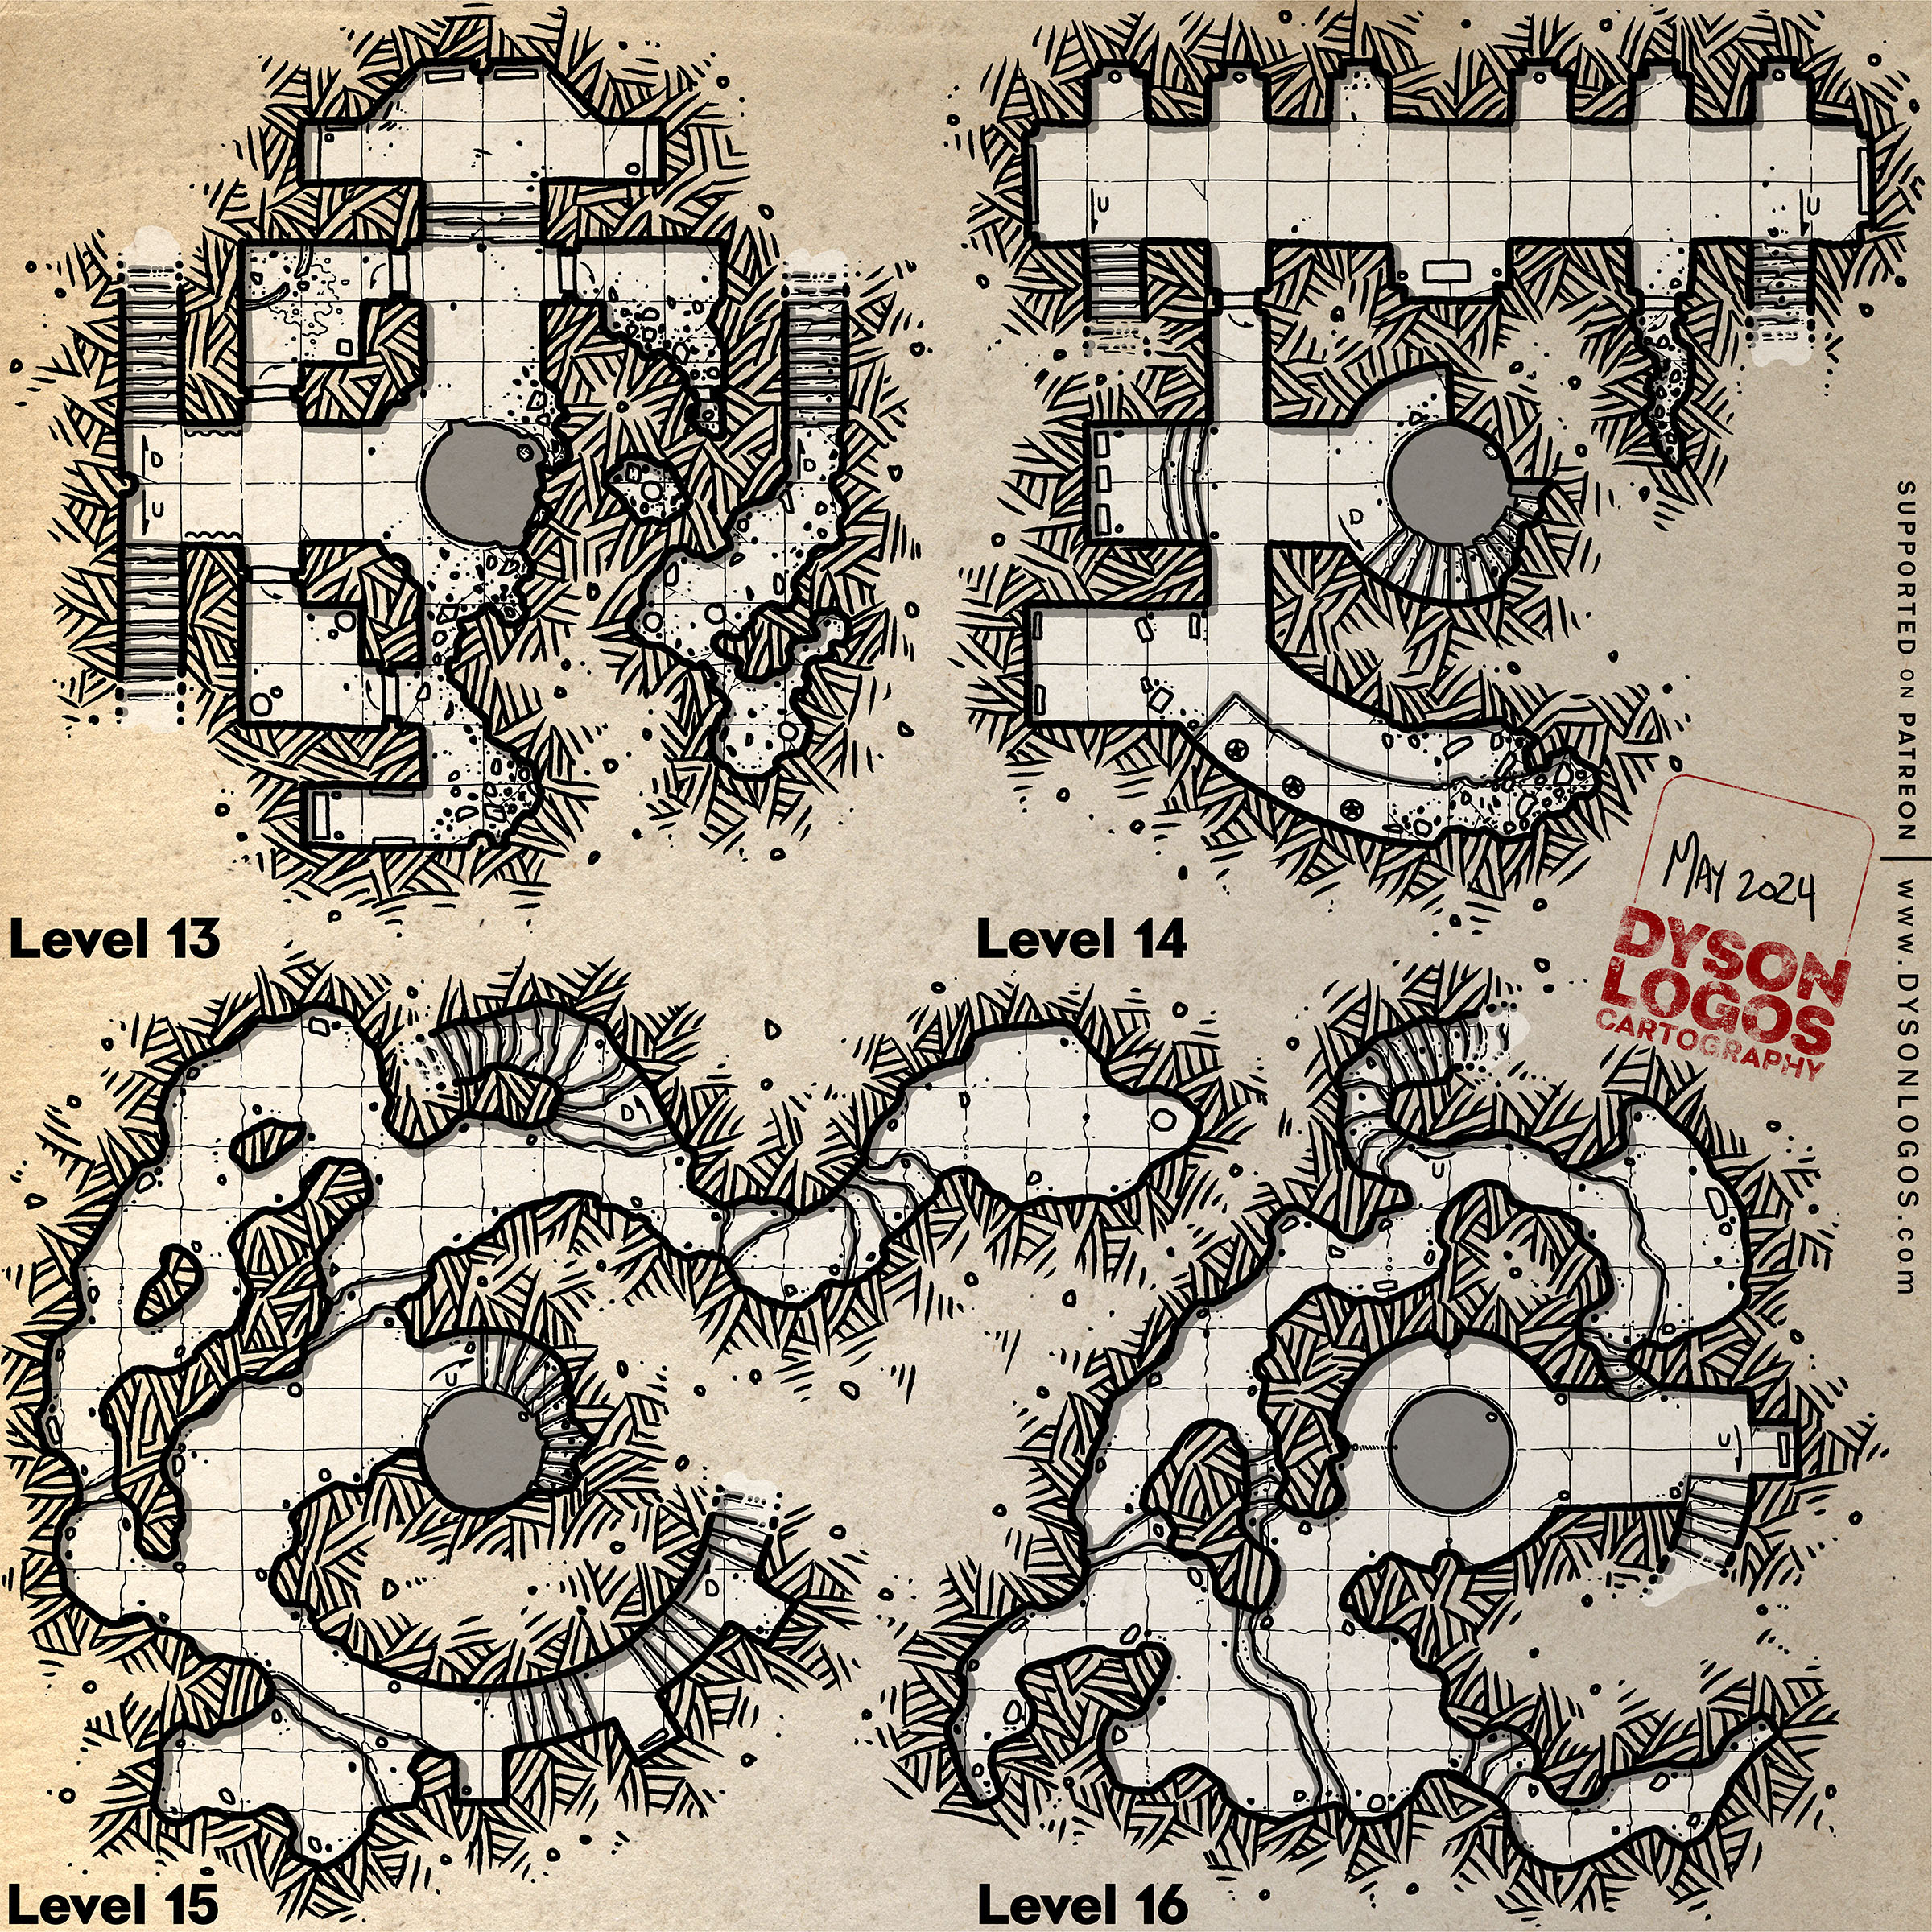
Iseldec’s Drop – Levels 13-16 (300 dpi, no commercial license)
We are beyond the halfway point in Iseldec’s drop – several hundreds of feet below the ruins above – the sun doesn’t ever reach down this far and is never directly overhead of the shaft – on the brightest days the only sign that there is an end to the shaft is the small circle of light far above.
These levels have stairs up to level 12, and thus are accessible to those creatures that come in via the doorway on that level. The four levels here are connected by stairs and caves as well as the central shaft, but there are no connectors except for the shaft from level 16 to level 17.
The stream of water that entered the dungeon on level 8 continues to pour down the shaft through these levels until it is caught on a lower level coming next month.
Iseldec’s Drop – Levels 13-16 (1200 dpi)
Level 15 on this map is the first level that exceeds the 160 foot x 160 foot area of the other levels, with a cave reaching east past those arbitrary limits. These levels are a mix of partially ruined and collapsed dungeons of otherwise remarkable stone work, and natural caves that have evidently had their floors smoothed to make them more traversable (much like classic TV show caves with their smooth sandy floors with the occasional “natural” steps up and down between sections).
Many of the “dungeon” sections here are badly damaged, with collapsed walls and ceilings, including the central shaft itself on levels 13-14-15.
Iseldec’s Drop – Levels 13-16 (1200 dpi, no grid)
Of particular note on these levels we have a collapsed section of level 13 that is only accessible from level 14; a shattered pool that still has a trickle of liquid in it on that same level; a collapsed semi-circular hallway on level 14 that is overlooked by a row of statues of forgotten persons all dressed in near-identical uniforms of unknown origin; and on level 16 there is a very heavy hemp rope attached to a ring in the wall that then descends into the shaft to unknown depths. This rope feels extremely heavy if pulled upon (as it descends all the way down to the bottom of the shaft on level 23).
The 1200 dpi versions of the map were drawn at a scale of 300 pixels per square and are 9,600 x 9,600 pixels (32 x 32 squares). To use this with a VTT you would need to resize the squares to either 70 pixels (for 5′ squares) or 140 pixels (for the recommended 10‘ squares that make sense with the design) – so resizing the image to 2,240 x 2,240 pixels or 4,480 x 4,480 pixels, respectively.
This map is made available to you under a free license for personal or commercial use thanks to the awesome supporters of my Patreon Campaign. Over 500 amazingly generous people have come together to fund the site and these maps, making them free for your use.Because of the incredible generosity of my patrons, I’m able to make these maps free for commercial use also. Each month while funding is over the $300 mark, each map that achieves the $300+ funding level will be released under this free commercial license. You can use, reuse, remix and/or modify the maps that are being published under this commercial license on a royalty-free basis as long as they include attribution (“Cartography by Dyson Logos” or “Maps by Dyson Logos”).Please note that the promotional version of this map (the one with the brown paper background) is not included in this commercial use license and the text & name are NOT released under this license, and cannot be used in conjunction with this map in a commercial project.
